Virginia Beach Beauty Life + Style Blog | SWEETHAUTE swthaute: Holidays
*Posts may contain affiliate links, proceeds generated from those links support this blog. Policy/Disclosure  
Showing posts with label Holidays. Show all posts

Thursday

Spring Marshmallow Bunny Ears Tutorial

Spring Marshmallow Bunny Ears Tutorial

How to make DIY Spring Marshmallow Bunny Ears Tutorial!
These colorful Rabbit Ears are so cute and easy. If you have a bag of marshmallows, sprinkles, and kitchen scissors that you are all set for creating these beauties. These are a wonderful idea for using as cupcake toppers either for Easter or any Spring occasion that calls for desserts.

These Marshmallow Rabbit Ears are an adorable and unique way to decorate with food crafts at this Easter's Dinner. The kids and special guests will get a kick out of these Marshmallow Bunny Ears since it's out of the ordinary and it also reminds me of Peeps- yet they are homemade DIY style:)
I actually made the colorful sugar sprinkles myself, yet you can purchase colorful sugar sprinkles to create the same effect.....or DIY it like me.

http://sweethaute.blogspot.com/2015/04/spring-marshmallow-bunny-ears.html


http://sweethaute.blogspot.com/2015/04/spring-marshmallow-bunny-ears.html

Supplies:

Marshmallows
Kitchen Scissors
Colorful Sugar Sprinkles
   -DIY:  To make: 1 cup sugar, 1 drop food color gel.
add more sugar for lighter color...more gel for darker shade.
{or}
Sugar
Gel Food Coloring

Step 1:

Make colored sugar sprinkles or purchase.

To make: 1 cup sugar, 1 drop food color gel.
add more sugar for lighter color...more gel for darker shade.

http://sweethaute.blogspot.com/2015/04/spring-marshmallow-bunny-ears.html

Step 2:

Cut your marshmallow ears. Set aside.


Step 3:

Dip pairs of ears in colorful sugars.


Step 4:

Serve on top of cupcakes or alone.

http://sweethaute.blogspot.com/2015/04/spring-marshmallow-bunny-ears.html

Enjoy!

http://sweethaute.blogspot.com/2015/04/spring-marshmallow-bunny-ears.html
Spring Marshmallow Bunny Ears- Cupcake Toppers


http://sweethaute.blogspot.com/2015/04/spring-marshmallow-bunny-ears.html


http://sweethaute.blogspot.com/2015/04/spring-marshmallow-bunny-ears.html

Please leave me a comment below.
If you make this please share it on the SWEET HAUTE Facebook Page.
Thank you so much for visiting....have a fantastic day!!!


~Be Sweet
Christina
Sweetest Haute 

SUBSCRIBE | and follow @SWEET HAUTE 
Pinterest | YouTube | Facebook {new page}, Twitter, | Instagram.

http://sweethaute.blogspot.com/2015/04/spring-marshmallow-bunny-ears.html


Tuesday

Bunny Cotton Tail Banner

Bunny Cotton Tail Banner

How to make a DIY Bunny Cotton Tail Banner at home during Spring Break with the kids:)
All you will need is colorful paper, pom poms, glue, and tape!
This Silhouette DIY Bunny Cotton Tail Banner is a fun idea and is so adorable + festive for the Easter Season. I love silhouette designs and patterns and this quick and easy project will set you in the right direction for making a beautiful setting for your gorgeous Easter Dinner.

You can use this Bunny Banner as decorative bunting, window decor, as trim for the fireplace mantle, as a theme for your Easter Dinner buffet station, and this would of course make an adorable decoration for the kid's table!  I used my Cotton Tail Pom Pom DIY Bunny Banner to decorate the windows of my office, they needed some Easter love!!!

DIY Bunny Cotton Tail Banner FREE PRINTABLE Template Pom Pom Decor
 DIY Bunny Cotton Tail Banner Decor

 I'm actually guest posting over at with the tutorial about how I made the Cross and DIY Easter Egg Bunting + Free Printables theme window decor shown in the image above.
Go check it out, learn how to make some more easy inexpensive decor and be sure to leave a comment telling Holly that you're visiting from the SWEET HAUTE Blog!

Supplies:

Card stock
   -pink
   -green
   -purple
   -tuquoise
White Cupcake Papers
   -large
Pom Poms
Mini Clothes Pins
Rick rack
Glue Dots
Washi Tape- optional

Tools:
Hot Glue Gun/ or glue
Glue Sticks
Glue Dots
Tape

DIY Bunny Cotton Tail Banner FREE PRINTABLE Template Pom Pom Decor

Step 1:

Cut out bunnies or use a craft cutting machine.

 Free Bunny Printable Easter Art by PaperCharm
 I used this as a bunny silhouette template!
FREE Printable Bunny Silhouette via PaperCharm

Step 2:

Glue pom poms on as tails. I used a glue gun, yet glue will work as well.

Step 3:

Spread out cupcake paper pleats a little to make them wider. Glue Dot your bunnies onto your cupcake papers.

Step 4:

Hang up your rick rack first and center it. Then pin your bunny banner onto the string with the mini clothes pins.
- I used Washi Tape to stick to the window so it would look vintage chic but if you don't have or want that, then use regular tape and your DONE:)

Cuteness achieved.
DIY Bunny Cotton Tail Banner FREE PRINTABLE Template Pom Pom Decor

Cuteness achieved.
These poor, dreary 50's military base office windows needed a lot of help this Easter!
Quick and Easy DIY Easter Spring Decor project using pom poms ribbon- SWEET HAUTE
 Hang up and you a ready!
This is also a great idea for making crafts as a kid's activity during Spring Break...

You may also be interested in:

http://sweethaute.blogspot.com/2015/03/bunny-cotton-tail-banner.html


Enjoy!
Please leave a comment below...
Thank you for visiting and have a wonderful day:)

~Be Sweet
Christina
Sweetest Haute 

SUBSCRIBE | and follow @SWEET HAUTE 
Pinterest | YouTube | Facebook {new page}, Twitter, | Instagram.


Sunday

Spring Decor Ideas + Inspiration

Easter and Spring Decor Ideas and Inspiration
I really love the colors of Spring and Easter because they are cheerful and yet they are calming....especially the pastel color palette. I've found some really great pieces and ideas to decorate your home for this Easter Season, maybe you can even DIY some of these yourself.

These goodies are also great and inspirational ideas for your Easter Dinner Party:)

Shop the post....

1. Aqua Leaf Spring Wreath  |  2. Throw Pillows  |  3. Easter Treat Baskets  |  4. Aqua Stripe Easter Dress  |  5. Easter Cookie Cutters  |  6. Spring Cupcake Topper/ Paper Kit  |  7. Egg Ceramic Crate  |  8. Marble Egg  | 9. Striped Throw Blanket  |  10. Pastel Plate Set  |  11. Egg Crystal Candy Dish  |  12. Mason Jar Aqua  |  13. Gold Polka Dot Candle  |  14. Mason Jar Utensil Holder  |  15. Robin Egg Decor  |  16.Ombre Floor Basket  |  17. Birds Nests Decor  |  18. Burlap Bin Bird Print
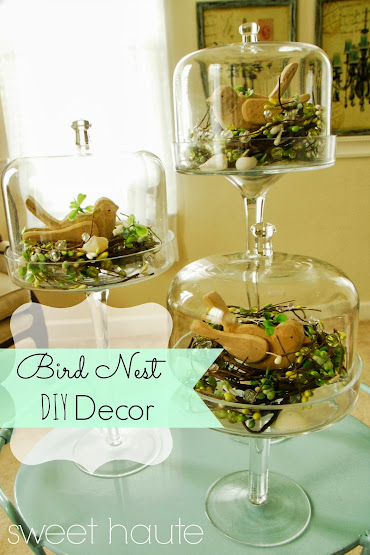
19. Peony Flower/Vase  |  20. Silver Tiered Serving Tray


http://sweethaute.blogspot.com/2015/03/easter-decor-ideas-inspiration.html
These picks will be sure to make your Easter Special Occasion extra special with your loved ones:)


Take a peak around and enjoy!!

http://www.shopstyle.com/action/loadRetailerProductPage?id=471852844&pid=uid5616-25479296-95

1. Aqua Leaf Spring Wreath  |  2. Throw Pillows  |  3. Easter Treat Baskets  |  4. Aqua Stripe Easter Dress  |  5. Easter Cookie Cutters  |  6. Spring Cupcake Topper/ Paper Kit  |  7. Egg Ceramic Crate  |  8. Marble Egg  | 9. Striped Throw Blanket  |  10. Pastel Plate Set  |  11. Egg Crystal Candy Dish  |  12. Mason Jar Aqua  |  13. Gold Polka Dot Candle  |  14. Mason Jar Utensil Holder  |  15. Robin Egg Decor  |  16.Ombre Floor Basket  |  17. Birds Nests Decor  |  18. Burlap Bin Bird Print
19. Peony Flower/Vase  |  20. Silver Tiered Serving Tray
Gorgeous Goodness:)


You may also be interested in:
Spring Favorite Things + Goodies Giveaway
http://sweethaute.blogspot.com/2015/03/goodies-giveaway-spring-favorite-things.html

Please leave a comment below:)
Thank you so much for visiting and have a wonderful day!!!


~Be Sweet
Christina
Sweetest Haute 

SUBSCRIBE | and follow @SWEET HAUTE 
Pinterest | YouTube | Facebook {new page}, Twitter, | Instagram.


Monday

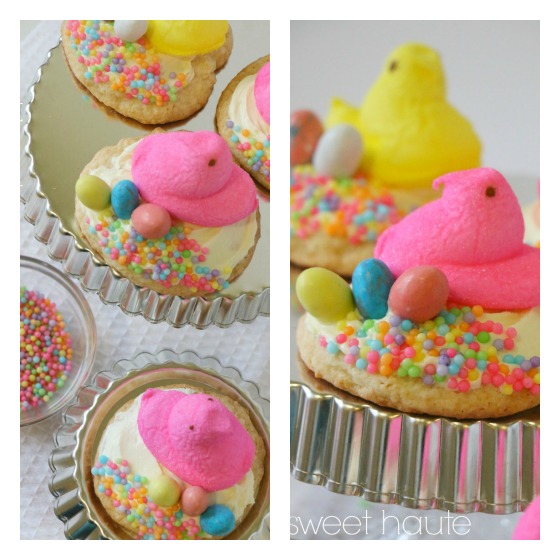
Peep Nest Cookies

Peep Nest Cookies with Peep Chicks!
This is the perfect 'food craft' DIY project for you and the little ones this Spring and they look like adorable little individual nests. You can make parts of the project ahead, then prepare them right before guests arrive to Easter Dinner or Brunch. You can find almost everything at the grocery store and the supplies are inexpensive. These Peep Nest Cookies are right on trend for an event for Spring or Easter because the eggs and chicks go well with both themes:)

http://sweethaute.blogspot.com/2015/03/peep-nest-cookies.html
Look at her sitting on her nest of colorful polka dots!


Supplies:
Peeps
Cookie Dough
-refrigerated
-boxed
Malted Eggs
Sprinkles
Frosting
-make your own
-can

Step 1:
Bake your cookies, set aside to cool.

Step 2:
Assemble nests cookies together before you will serve them.
Frost, add sprinkles, peeps, and malted eggs.

Bake. Decorate!
Easy spring project to make with the kids:)

 These are perfect for a treat after Easter Dinner!

 http://sweethaute.blogspot.com/2015/03/peep-nest-cookies.html

http://sweethaute.blogspot.com/2015/03/peep-nest-cookies.html

I made the cute silver tiered trays too out of dollar store items....DIY tutorial here!

http://sweethaute.blogspot.com/2015/03/peep-nest-cookies.html
Peep Nests Cookies....for Easter:)


You may also like:
Skateboard Bunny Peep Treats
http://sweethaute.blogspot.com/2015/03/skateboard-bunny-peep-treats.html


If you make this project please share it on the SWEET HAUTE Facebook Page!
Have a great week:)

~Be Sweet
Christina
Sweetest Haute 

SUBSCRIBE | and follow @SWEET HAUTE 
Pinterest | YouTube | Facebook {new page}, Twitter, | Instagram.



Sunday

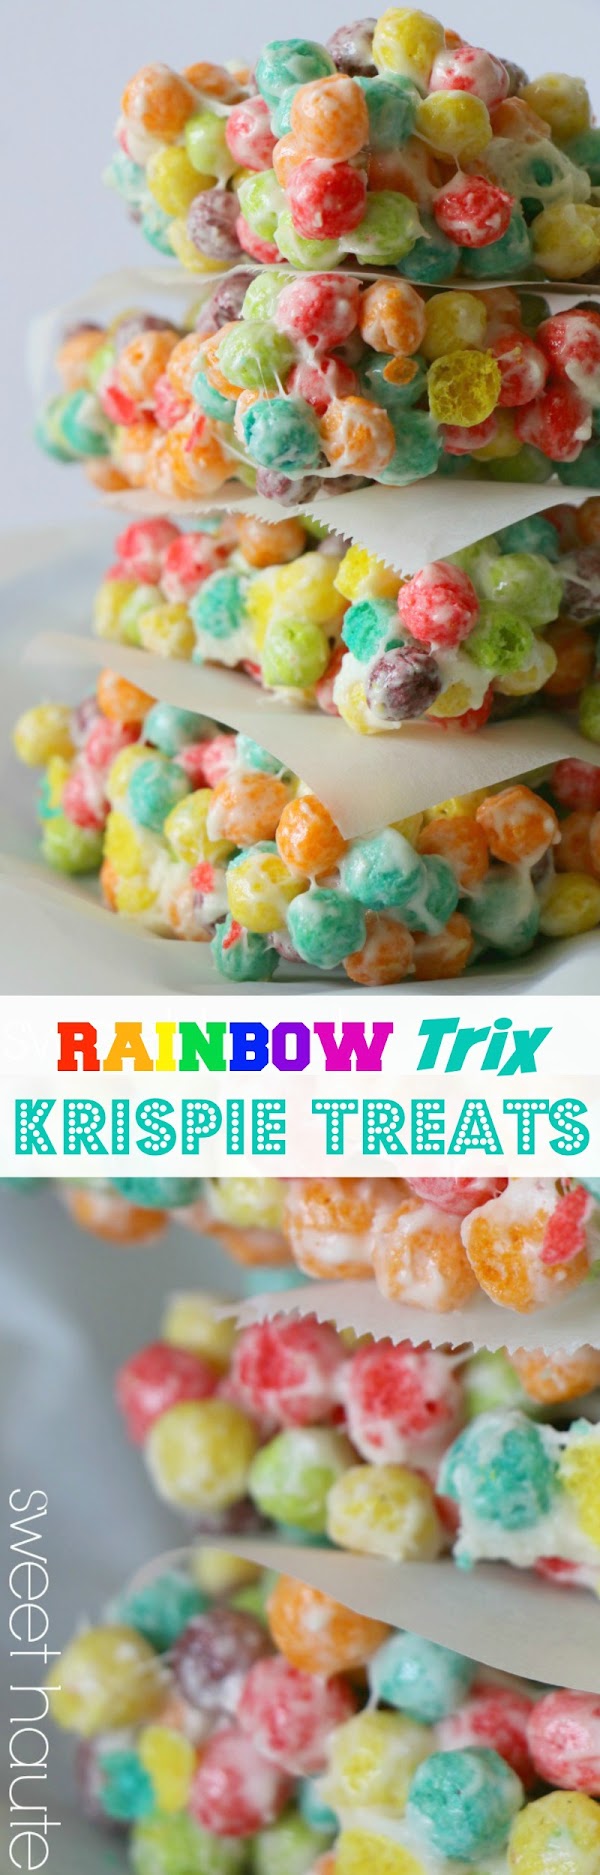
Rainbow Trix Krispie Treats


Rainbow Trix Krispie Treats

How to make Over the Rainbow Trix Krispie Treats for a party, event, birthday, or St. Patrick's Day.
These treats are similar in texture as the famous beloved rice krispie treats only they are made from Rainbow color Trix cereal.....fun right! My kids loved this project and they loved eating them too when we were done making them together as a family.

We already had everything we need right there in the house. This recipe project was fast, quick, easy, and inexpensive to make because we already had the ingredients on hand ready to go.
Basically this is a 3 ingredient project! Ready to make some treats?

http://sweethaute.blogspot.com/2015/03/rainbow-trix-krispie-treats.html


Supplies:

6 Cups Rainbow Trix Cereal
  -mini
  -large
3 Tablespoon Butter
Large Bowl
Spatula
Wax Paper/ Parchment Paper
Non-stick Cooking Spray

Serving Size: 16

Step 1:

Spray pan/ baking sheet with non-stick cooking spray. Set aside.

Step 2:

Warm up marshmallows (the whole bag) or jar in a bowl with 3 Tablespoons butter in microwave. Warm for 45 seconds. Stir.

Step 3:

Warm in microwave for 45 more seconds. Stir until fluffy and smooth.

Step 4:

Add in 6 Cups of Rainbow Trix cereal. Combine by folding.

Step 5:

Quickly pour mixture into flat baking pan and even it out across equally. Let cool for marshmallow to set, cut and serve. Parchment paper or wax paper is good for this step.

DONE.
Individually wrap with a piece of wax/parchment paper in between if you are using for an event or bringing them to school etc!
 

Tip: Cut up into portions and separate with wax/parchment paper and store in an air tight container. In humid climates you may need to place in fridge to set before cutting treats.

http://sweethaute.blogspot.com/2015/03/rainbow-trix-krispie-treats.html
Ooooowy Gooooowy goodness?!?

http://sweethaute.blogspot.com/2015/03/rainbow-trix-krispie-treats.html
They came out so colorful and cheery!
http://sweethaute.blogspot.com/2015/03/rainbow-trix-krispie-treats.html
 If you try this recipe DIY project out, please share it on the SWEET HAUTE Facebook Page!
Please leave a comment below.
Thank you so much for visiting!!!
Have a fantastically rainbow filled day:)


~Be Sweet
Christina
Sweetest Haute 

SUBSCRIBE | and follow @SWEET HAUTE 
Pinterest | YouTube | Facebook {new page}, Twitter, | Instagram.

http://sweethaute.blogspot.com/2015/03/rainbow-trix-krispie-treats.html

Thursday

St. Patrick's Day Lucky Pudding

How to make unique desserts for St. Patrick's Day using things in your pantry.
This is a St. Patrick's Day Layered Lucky Pudding project that you can do with your kids to make dessert, celebrating St. Patrick's Day. This layered pudding is also a great food idea for any event or birthday party that may use rainbow as the theme or green in the color combination.
We really liked this DIY project because it was fun, quick and easy....but best of all it was virtually free {budget friendly} because we had everything we need already in the cabinet and fridge!

SCORE!

http://sweethaute.blogspot.com/2015/03/st-patricks-day-lucky-pudding.html
St. Patrick's Day Layered Lucky Pudding
#tastetherainbow

Ingredients:

Green Jello Pudding
-Pistachio
White Jello Pudding
-Vanilla / White Chocolate
Milk
-Skim / Low Fat
Lucky Charms Cereal
Whipped Cream
Green Sugar Sprinkles

Supplies:

Glass
Mixing Bowl
Plate

http://sweethaute.blogspot.com/2015/03/st-patricks-day-lucky-pudding.html

Step 1:

Separate the lucky charm marshmallows from cereal and pick which colors you want to use.

Step 2:

Use the plate to pour a layer of green sugar on for dipping. Prep each glass by wetting the rims of the glass and dipping them in the green sugar.

Step 3:

Prep the pudding with cold milk. Set aside.

Step 4:

Start layering the pudding into glasses. Be careful not to disturb the green sugar.

Step 5:

Add whipped cream on top of the pudding layers and top with Lucky Charms marshmallows.

recipes, ideas, st patricks day, lucky charms
 Look at all the pretty colors....kids are going to go wild, literally...

Serve and Enjoy!

http://sweethaute.blogspot.com/2015/03/st-patricks-day-lucky-pudding.html

Please leave a comment below!
Have a wonderful day, thank you for visiting:)

http://sweethaute.blogspot.com/2015/03/st-patricks-day-lucky-pudding.html

http://sweethaute.blogspot.com/2015/03/st-patricks-day-lucky-pudding.html

If you try this, please share it on our Facebook Page!


~Be Sweet
Christina
Sweetest Haute 

SUBSCRIBE | and follow @SWEET HAUTE 
Pinterest | YouTube | Facebook {new page}, Twitter, | Instagram.


Wednesday

Pink and Gold DIY New Years Eve

New Year's Eve DIY Decor
Pink and Gold....Pink and Gold
Beautiful and bright ideas for a girl's girl, ladies night out....
Super pretty and super festive plethora of party inspiration and DIY projects:)
Pink and Gold NYE


Pink and Gold DIY New Years Eve
sweethaute.blogspot.jp


Pink and Gold DIY New Years Eve
sweethaute.blogspot.jp


Pink and Gold DIY New Years Eve
sweethaute.blogspot.jp


Pink and Gold DIY New Years Eve
sweethaute.blogspot.jp


Pink and Gold DIY New Years Eve
sweethaute.blogspot.jp


Pink and Gold DIY New Years Eve
sweethaute.blogspot.jp


Pink and Gold DIY New Years Eve
sweethaute.blogspot.jp


Pink and Gold DIY New Years Eve
sweethaute.blogspot.jp


Pink and Gold DIY New Years Eve
sweethaute.blogspot.jp


 Add extra sparkle to your bubbly. | 21 Fun Ways To Have A Fancy And Delicious New Year's Eve
Glitter Champagne Bottle Tutorial
It's like pink and gold ombre bliss:)

 New Years: 25 DIY Sparkly Party Ideas at the36thavenue.com These are so fun! #newyears #glitter #sparkle


51 DIY Ways To Throw The Best New Year's Party Ever | 51 DIY Ways To Throw The Best New Year's Party Ever 

New Year's Eve Party Hats
newyears2
 
 Top your drinks with these sequined star stirrers.

Last-Minute New Year's Eve Party Ideas, New Year's champagne in 2014, 2014 New Years champagne
 Use glittery marshmallow stars if you're serving hot chocolate.
 

Spell letters out with pipe cleaners to make cake toppers or drink stirrers.

 Hang some flashy pyramid ornaments.

Serve gold-spun cotton candy.


Spray-paint bow-tie pasta to make an easy garland.


 Fold paper cubes to make a decorative string of lights.

Confetti balloons | How To Throw A Fancy New Year's Party On A Budget


Pinata DIY

Please leave a comment below:)

~Be Sweet
Christina
Sweetest Haute

Please SUBSCRIBE, and follow along @SWEET HAUTE on Pinterest, YouTube, Facebook {new page}, Twitter, and Instagram.


Pin It button on image hover