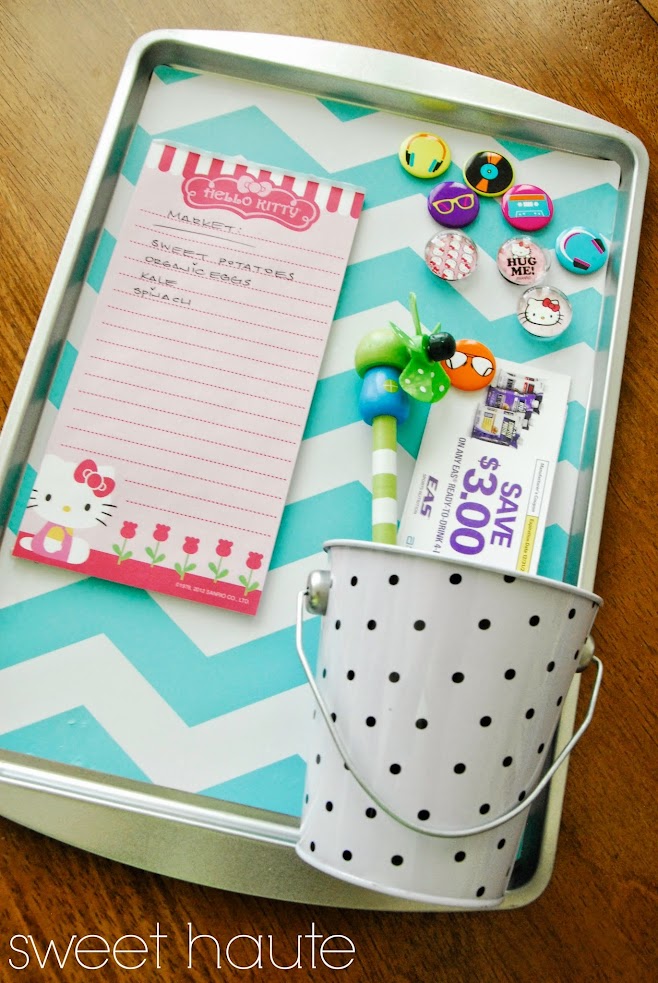
Cookie Sheet DIY Magnetic Board-Tutorial
This DIY project that I'm sharing it a quick and inexpensive way to achieve some organization in your home make any space more user friendly. In my case, I made this Magnetic Pin Board for my Pantry Organization- Fit and HAPPY project that I posted prior to this blog post.
DIY Cookie Sheet Magnetic Board
The source list for the items you'll need or that you see here will be at the end of this post...
Here is where it's home is, in our pantry;)
Supplies:
Credit Card
Bucket
The source list for the items you'll need or that you see here will be at the end of this post...
Check out my Pantry Organization Makeover- Fit and HAPPY! post over here....
You'll see all the details of our lovely pantry of our dreams and take the full tour!!
Fun and adorable magnets... Target dollar bins, love!
I used this chevron shelf liner that I had left over from a different project I used it for.
You can check it out by clicking here: Chevron DIY Refrigerator Door/Shelf Mats
Step 1:
Determine where you want you board to hang, I used a Velcro Command Strip to hang ours because I didn't want nail holes in my bead-board.
- First, let strip "set" on the cook sheet, at LEAST 15-20 min.
- Second, adhere to wall strip using the TIP written below under the image. Let that strip "set" at LEAST 15-20 min, I let my strip adhesive "set" overnight.
TIP: In order to adhere your Velcro strip, attach it to the cookie sheet first (the Velcro "teeth" lightly connected to opposite strip that will stick to wall), peel off the wax side of strip facing wall lightly THEN remove, press wall strip firmly for 2 min. stick to wall. Follow instructions on package.
Step 2:
Next, work on the magnetic board. Gather your supplies. Trace the back of the shelf liner with the bottom of the Cookie sheet.
Step 3:
Using a credit card type item, slowly smooth down on to the metal cookie sheet so that it is flat.
Step 4:
Using glue like E600 adhesive or similar, attach your metal bucket. Let it securely set before moving the board around. Preferably overnight, just in case {as my son would say.}
Get all your goodies to add to the board.
Source list:
Cookie Sheet- Dollar Tree $1 ea
Shelf Liner- already had FREE
Small Bucket- Target, dollar bins $1 ea
Hello Kitty Magnets- Target, dollar bins $1 ea
Headphone Magnets- Target, dollar bins $1 ea
Hello Kitty Note Pad- Target
Pinwheel Pen- gift, already had FREE {Michael's? JoAnn?}
Hope you enjoyed this post and I hope it will inspire you to create something fun for your space!
Please leave me a comment below to let me know you stopped by to visit and if you have any questions, feel free to ask. Have a great day!
~Be Sweet
Subscribe to the blog in the side bar, and Follow along
@SWEET HAUTE on Pinterest, Instagram, FB (new page), Twitter, and YouTube
Visit SWEET HAUTE's profile on Pinterest.
Please leave me a comment below to let me know you stopped by to visit and if you have any questions, feel free to ask. Have a great day!
~Be Sweet
Christina
Sweetest Haute
Subscribe to the blog in the side bar, and Follow along
@SWEET HAUTE on Pinterest, Instagram, FB (new page), Twitter, and YouTube
Visit SWEET HAUTE's profile on Pinterest.


Loving the chevron!!
ReplyDeleteWhat a great idea! I love the paper you used!
ReplyDeleteThis is so cute (and practical!) Thank you for sharing (: xoxo
ReplyDeletelove this cute upcycle. I have a couple of baking sheets that need to be retired and this would be a perfect use for them!
ReplyDeleteThis is so cute! I've got some dry erase contact paper laying around that I've been trying to decide what to do with. I think I'll make one of these!
ReplyDeleteHi Christina, I'm using the E600 spray adhesive and am having trouble getting the bucket glued on. Any tips?! Thanks for your help!
ReplyDeleteHi Christina! I'm using the E600 spray adhesive for the bucket, but I'm having trouble getting it glued on there. Any tips!?
ReplyDeleteHi Christina, I've got the E600 spray adhesive but I'm having trouble getting the bucket glued on. Any tips!?
ReplyDelete