

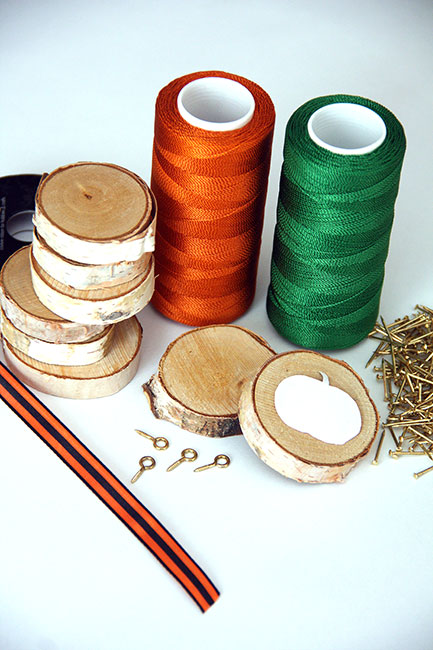
The supplies are pretty minimal for this craft. I purchased two different kinds of thin string in orange and green. You'll need gold (or silver) nails, eye hole screws, ribbon and tree rounds. I found the birch rounds at Hobby Lobby in their wood section.

I found some clip art of a pumpkin shape online and I printed and cut it out. Then I traced around it with a pencil on the birch round.
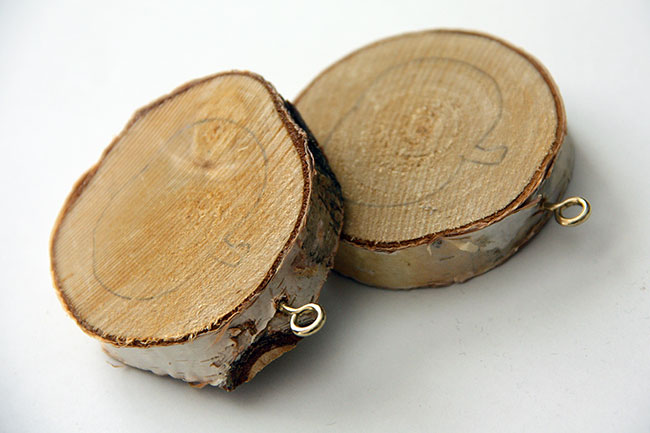
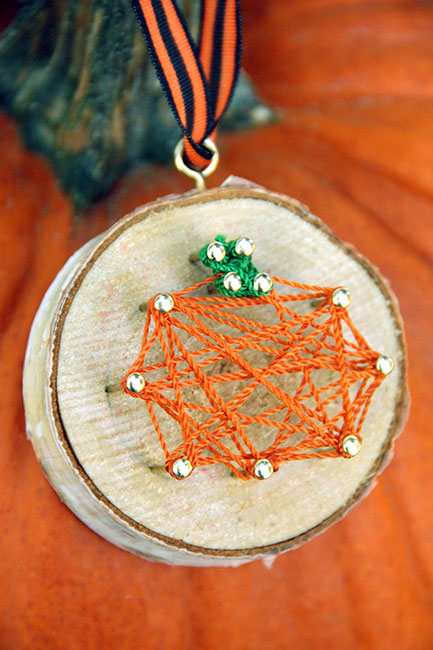
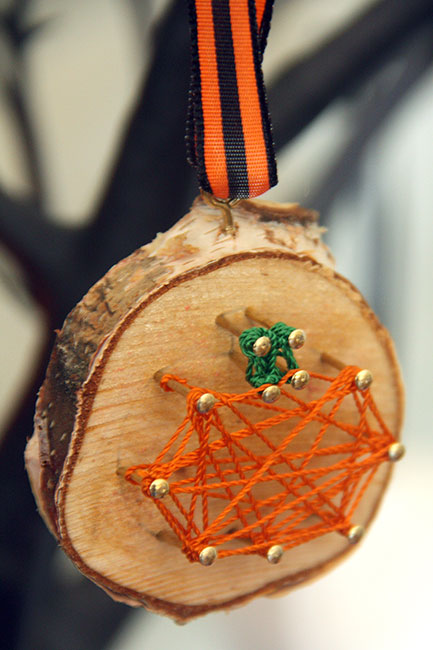
Add the eye hole fastener to the top of each birch round.
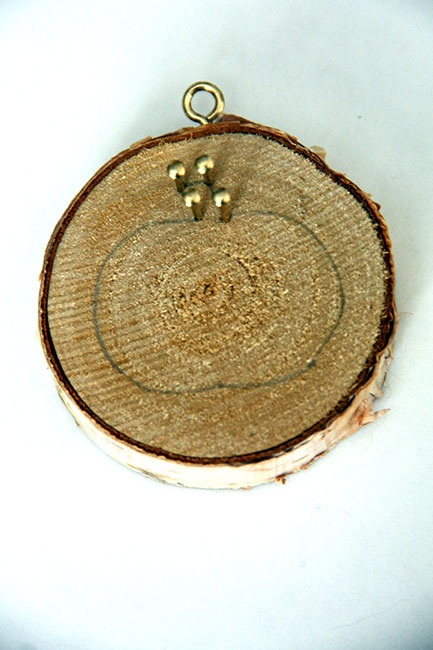
Then I hammered in some nails where the stem is at on the pumpkin.
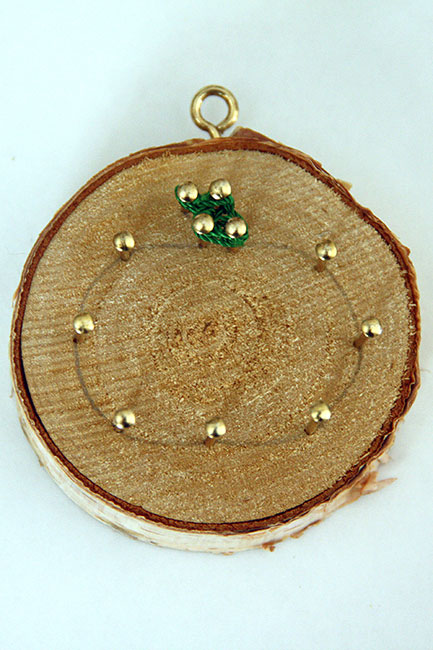
This photo shows two steps, I wrapped the green string around the stem several times (don't forget to outline it with the thread, too!) and then I added nails around the perimeter of the pumpkin's body.
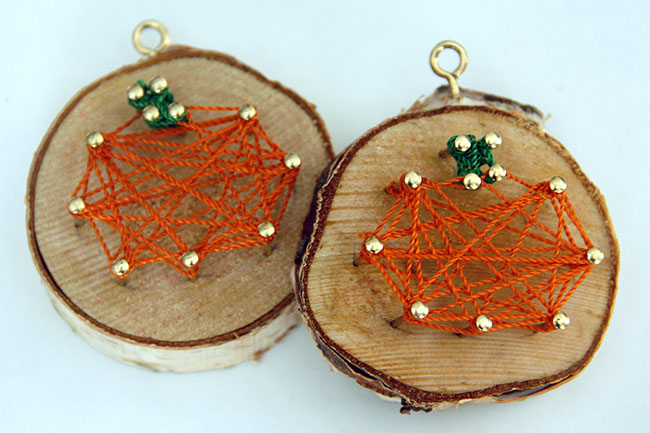
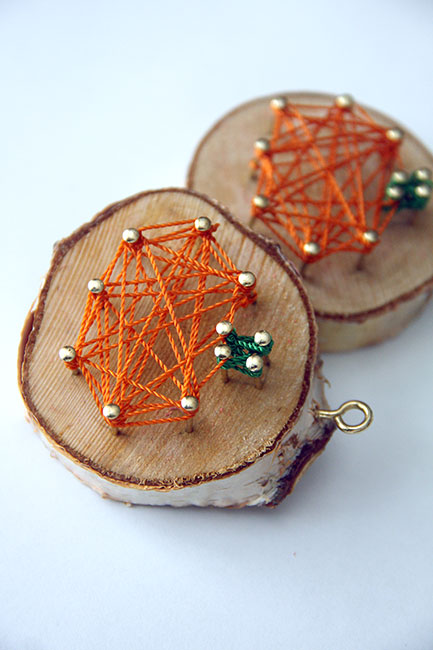
Then, thread the orange string around the pumpkin's body. Easy peasy!
Isn't this the simplest string art project ever? You could do a Christmas ornament version of this, too! Such as a snowflake or Christmas tree.
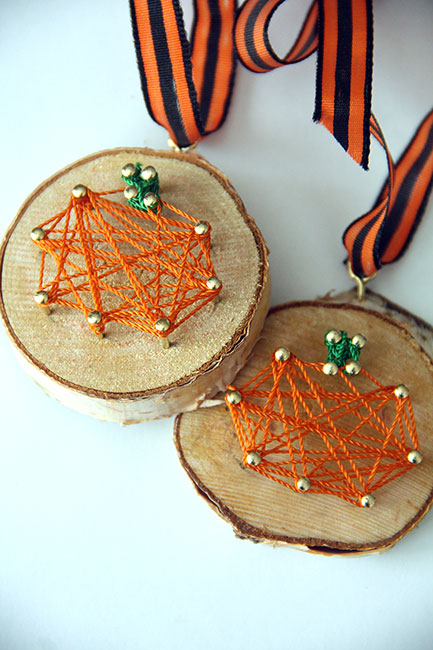
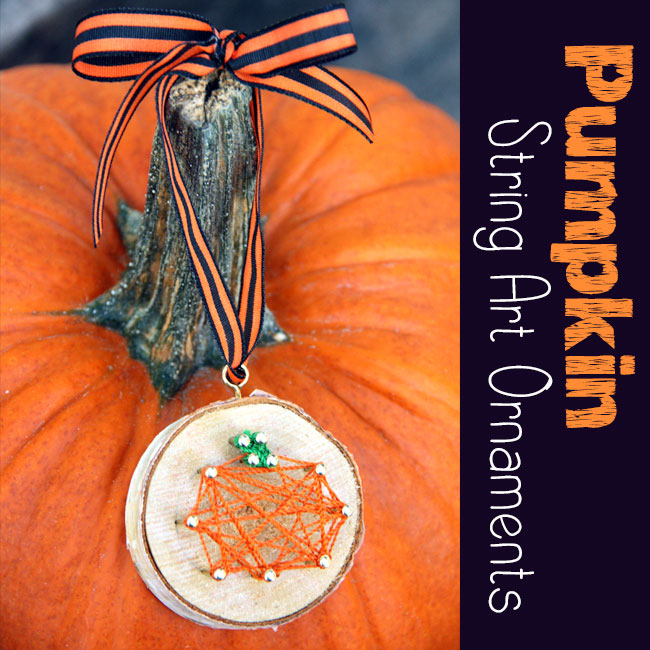
Add some ribbon and tie a bow at the top of the ribbon and you have yourself an ornament!
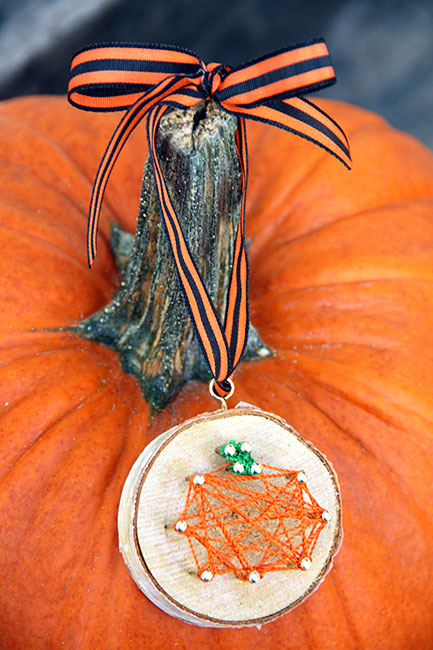
You can even hang these on the stems of your pumpkins outside for a little extra decoration this fall.
These would also be cute to make for a little gift, to add onto gift wrap with a bow or you can make them without the eye hole screw and just display them on a shelf or mantel for decor.
For now, mine will hang on my Halloween tree. If you want to see my Halloween tree, click HERE.

This is a photo from last year... but, here are the kids with our Halloween tree! So much fun!
And here are ornaments from years past:

Bottle Cap Spiders

2011 - Mummy Balls


No comments:
Post a Comment
Welcome to the SWEET HAUTE Blog! I recently switched back to Blogger after goDaddy managed WP deleted my database from 2015-on so most if not all current comments/ past posts are gone. Please leave a comment or ask a question below. If a post you are looking for isn't appearing, it is still on my YouTube channel. You can also email me, find out more in the 'About' section. Thanks!
~Be Sweet
Christina
Sweetest Haute